Installing MultiChain on Linux
su (enter root password)
cd /tmp
wget https://www.multichain.com/download/multichain-1.0.5.tar.gz
tar -xvzf multichain-1.0.5.tar.gz
cd multichain-1.0.5
mv multichaind multichain-cli multichain-util /usr/local/bin (to make easily accessible on the command line) exit (to return to your regular user)
We need two servers with multichain installed on them.
Try Amazon EC2.
After installing multichain and initializing the blockchain, make sure you modify the Network and security settings port numbers to allow the two nodes to communicate with each other.
1. Creating a blockchain
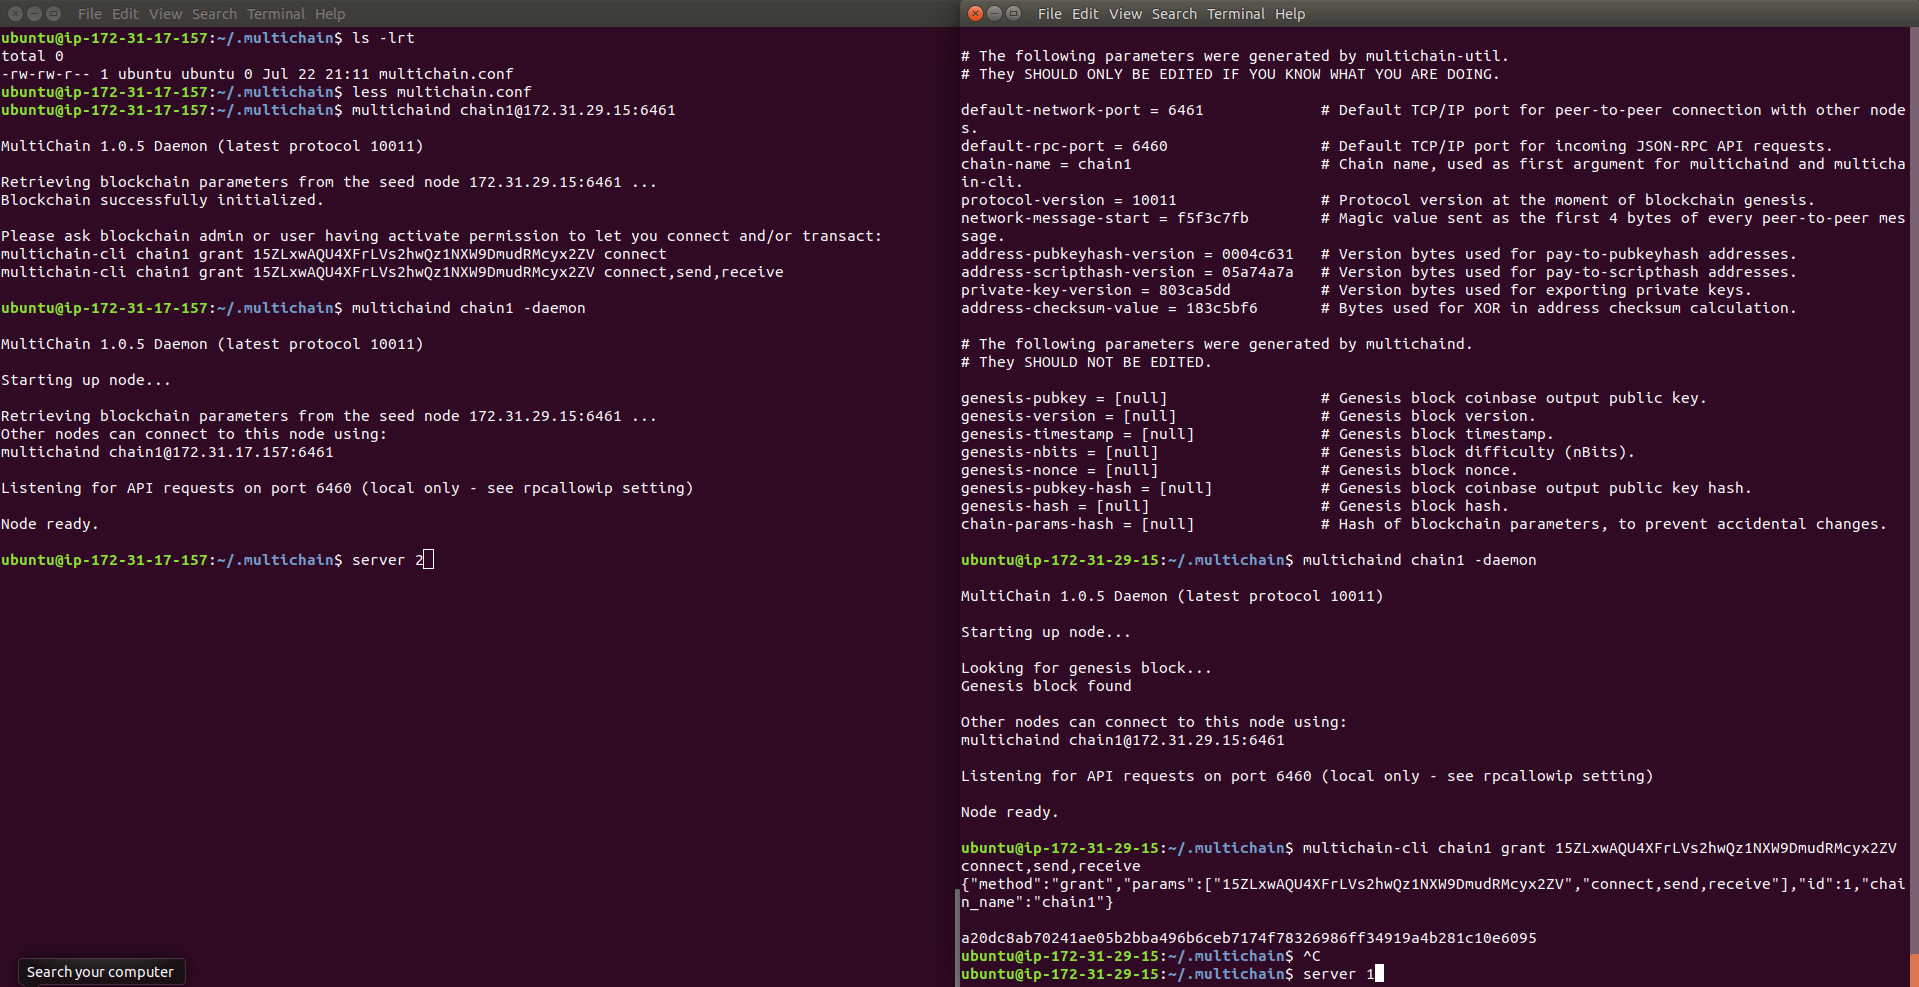
First we will create a new blockchain named chain1. On the first server, run this command:
multichain-util create chain1
View the blockchain’s default settings:
cat ~/.multichain/chain1/params.dat
Initialize the blockchain, including creating the genesis block:
multichaind chain1 -daemon
2. Connecting to a blockchain
Now we’ll connect to this blockchain from elsewhere. On the second server, run the following:
multichaind multichaind chain1@172.31.29.15:6461
You should be told that the blockchain was successfully initialized, but you do not have permission to connect. You should also be shown a message containing an address in this node’s wallet.
Back on the first server, add connection permissions for this address:
multichain-cli chain1 grant 15ZLxwAQU4XFrLVs2hwQz1NXW9DmudRMcyx2ZV connect,send,receive
Now try reconnecting again from the second server:
multichaind chain1 -daemon

3. Some commands in interactive mode
Before we proceed, let’s enter interactive mode so we can issue commands without typing multichain-cli chain1 every time. On both servers:
multichain-cli chain1
If you are using Windows, interactive mode is not yet available, so all commands in this guide should be preceded by multichain-cli chain1. You will also need to open another DOS command line in the directory where you installed the MultiChain executables.
Now that the blockchain is working on two nodes, you can run the commands in this section on either or both. To get general information:
getinfo
See a list of all available commands:
help
Show all permissions currently assigned:
listpermissions
Create a new address in the wallet:
getnewaddress
List all addresses in the wallet:
getaddresses
Get the parameters of this blockchain (based on params.dat file):
getblockchainparams
For each node, get a list of connected peers:
getpeerinfo
4. Streams
Now let’s create a stream, which can be used for general data storage and retrieval. On the first server:
create stream stream1 false
The false means the stream can only be written to by those with explicit permissions. Let’s see its permissions:
listpermissions stream1.*
So for now, only the first server has the ability to write to the stream, as well as administrate it. Let’s publish something to it, with key key1:
publish stream1 key1 73747265616d20646174358
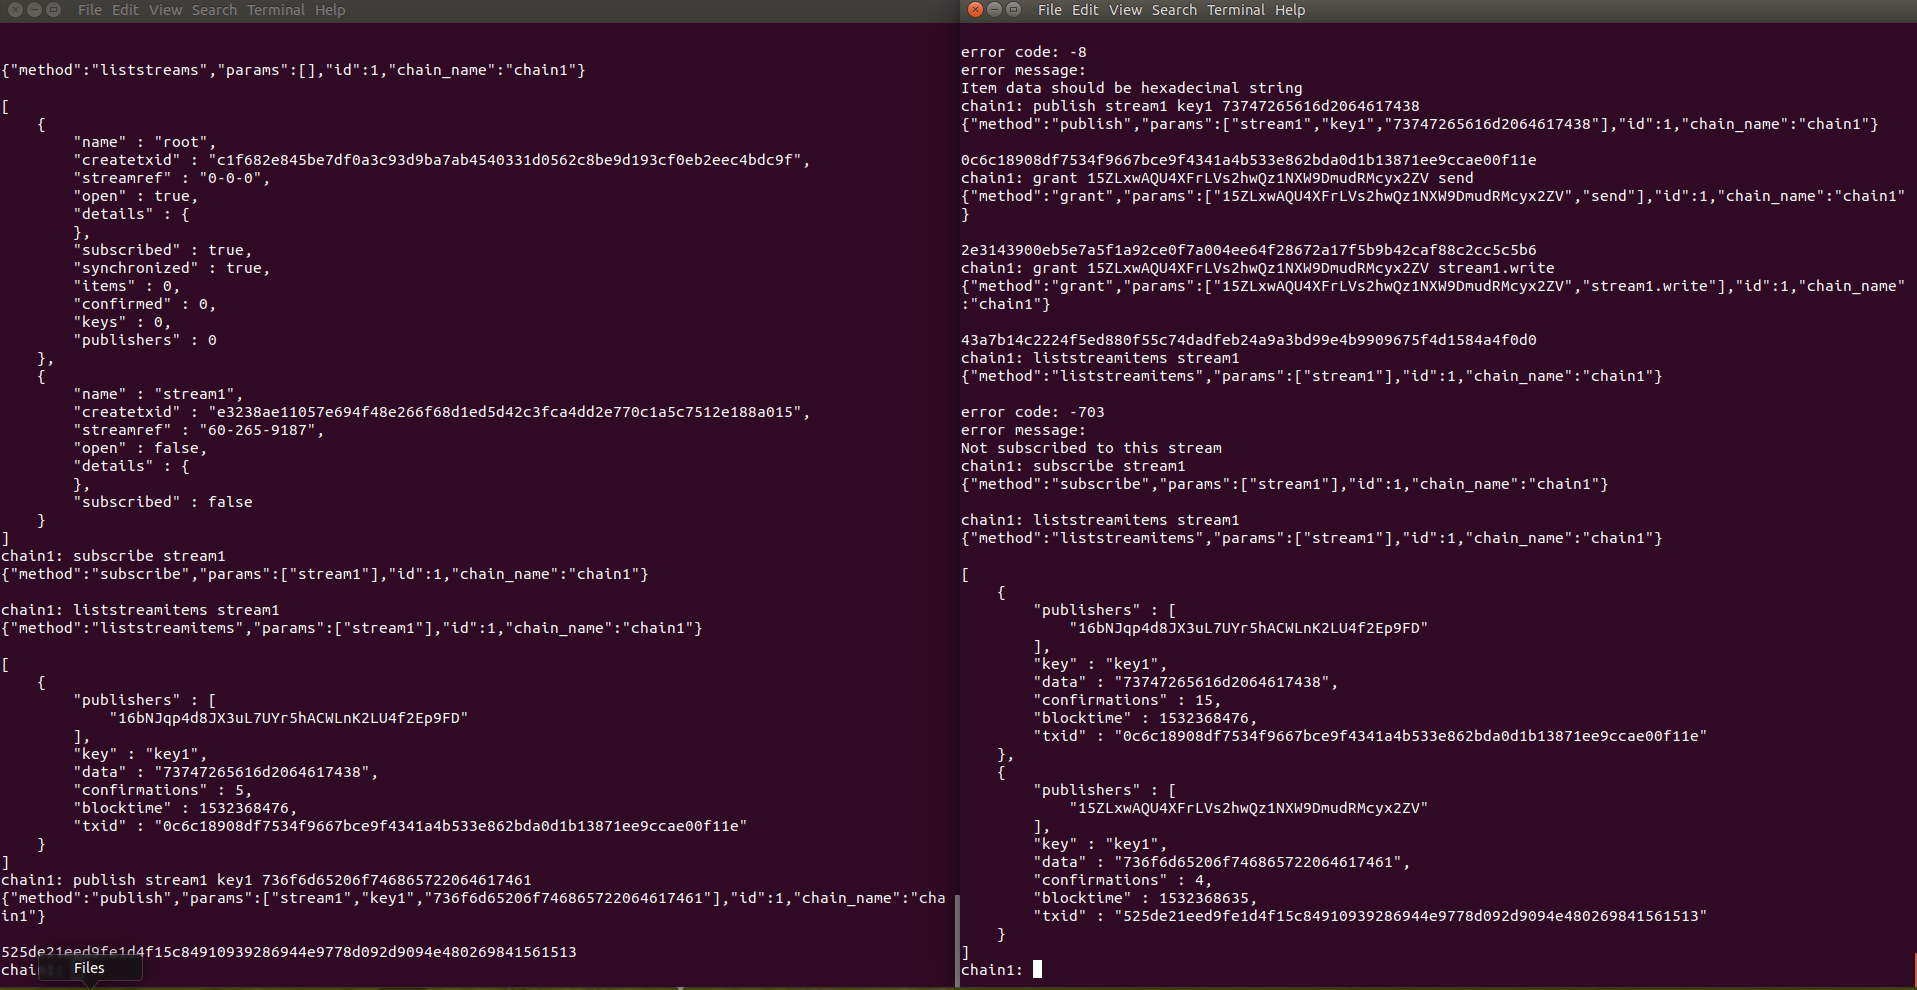
The txid of the stream item is returned. Now let’s see that the stream is visible on another node. On the second server:
liststreams
(The root stream was in the blockchain by default.) Now we want the second server to subscribe to the stream, then view its contents:
subscribe stream1
liststreamitems stream1
Now we want the second server to be allowed to publish to the stream. On the first server:
grant 15ZLxwAQU4XFrLVs2hwQz1NXW9DmudRMcyx2ZV send
grant 15ZLxwAQU4XFrLVs2hwQz1NXW9DmudRMcyx2ZV stream1.write
Note that the address needs both general send permissions for the blockchain, as well as permission to write to this specific stream. Now let’s publish a couple of items on the second server:
publish stream1 key1 736f6d65206f746865722064617461
publish stream1 key2 53747265616d732052756c6521
Now let’s query the stream’s contents in many different ways. Back on the first server:
subscribe stream1
liststreamitems stream1 (should show 3 items)
liststreamkeys stream1 (2 keys)
liststreamkeyitems stream1 key1 (2 items with this key)
liststreampublishers stream1 (2 publishers)
liststreampublisheritems stream1 1... (2 items by this publisher)

Reference: https://www.multichain.com/getting-started/


